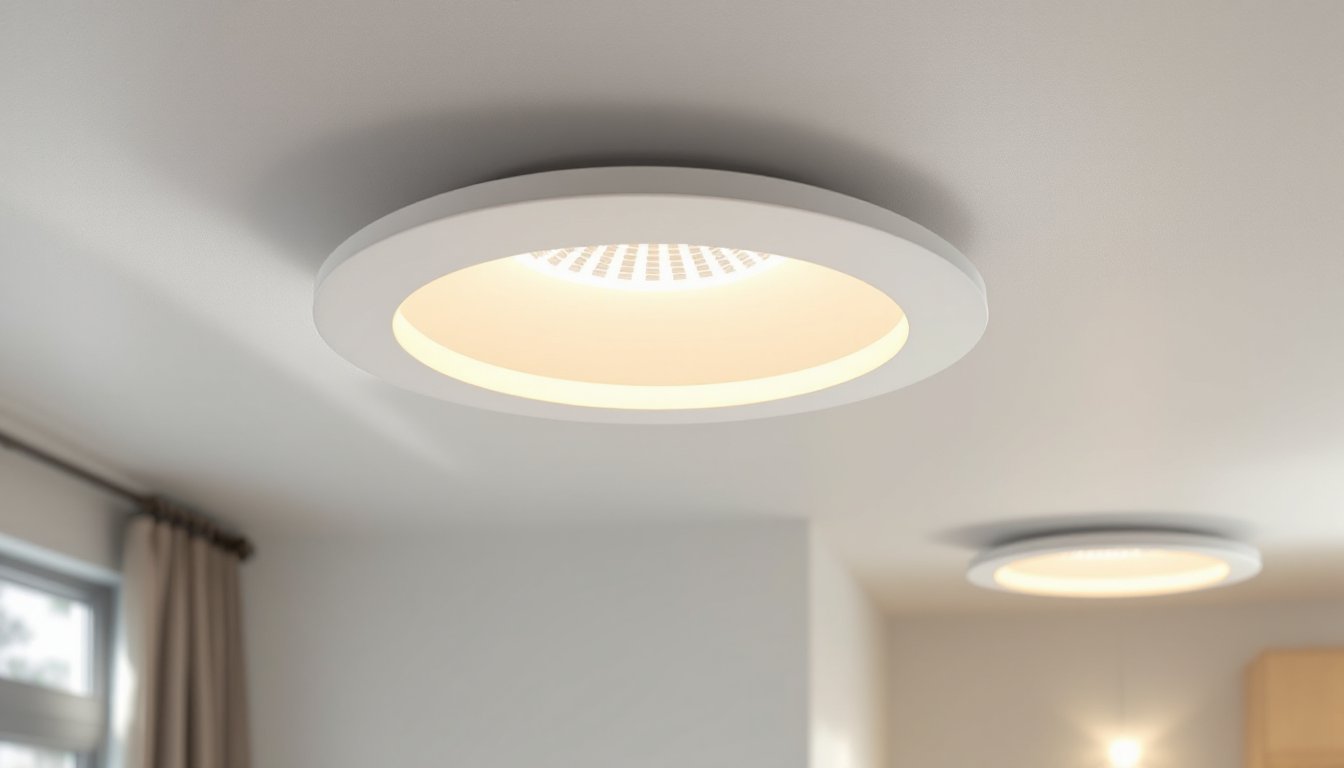
Canless recessed lighting has transformed how electricians and DIYers approach ceiling lighting. Unlike traditional recessed fixtures that require bulky metal housings, these integrated LED units install directly into drywall with minimal effort and space. The 6 inch diameter remains the most popular size for general residential lighting, offering enough output for living rooms, kitchens, and bedrooms without overwhelming smaller spaces. This guide covers everything from feature selection to installation techniques, helping homeowners make informed decisions about upgrading or installing new recessed lighting in 2026.
Table of Contents
ToggleKey Takeaways
- 6 inch canless recessed lighting delivers 650–1,200 lumens while using 50% less installation time than traditional recessed fixtures, making it ideal for kitchens, bedrooms, and living rooms.
- Canless recessed lighting integrates the LED source, driver, and trim into a single slim unit that fits directly into drywall with minimal space requirements and eliminates bulky housing concerns.
- When selecting 6 inch canless fixtures, prioritize color temperature adjustability (2700K–5000K), lumens output of 800–1,000 for ambient lighting, and dimmability compatibility to avoid flickering.
- Proper spacing of 4–6 feet apart and positioning at least 18 inches from walls ensures even light coverage without shadows, dark edges, or the harsh spotlight effect of smaller fixtures.
- Always verify power is off with a non-contact voltage tester, check local codes for permits, use correct wire gauge (14 AWG for 15-amp, 12 AWG for 20-amp), and avoid covering fixtures with insulation that blocks airflow around the driver.
- Common installation mistakes like mismatched dimmers, overlighting, and cutting holes before checking for obstructions can compromise performance, so verify fixture compatibility and joist locations before beginning work.
What Is Canless Recessed Lighting?
Canless recessed lighting eliminates the traditional housing can (or “recessed can”) that’s been standard since the mid-20th century. Instead of a separate metal cylinder mounted above the ceiling and a removable trim below, canless fixtures integrate the LED light source, driver, and trim into a single slim unit, typically 2 to 3 inches deep.
The fixture mounts directly to ceiling joists or uses spring-loaded clips that grip the drywall from above. This design offers several practical advantages: it fits in shallow ceiling cavities where traditional cans won’t, reduces installation time by roughly 50%, and eliminates the risk of incorrect can-trim compatibility.
Most canless units connect via a standard junction box or use proprietary quick-connect wiring harnesses. They’re rated for insulation contact (IC-rated equivalent) since there’s no overheating risk from a separate housing and bulb. The integrated LED typically lasts 50,000 hours or more, meaning homeowners won’t replace bulbs for decades under normal use.
One trade-off: when the LED eventually fails, the entire fixture requires replacement rather than just a bulb. But, given the lifespan and dropping prices, this is rarely a concern for residential applications.
Why Choose 6 Inch Canless Recessed Lights
The 6 inch aperture sits in a sweet spot for residential lighting. It delivers 650 to 1,200 lumens depending on the model, enough to provide general ambient lighting without the harsh spotlight effect of smaller 4 inch fixtures or the overkill of commercial-grade 8 inch units.
For kitchen task lighting, a 6 inch fixture provides adequate coverage over countertops when spaced 4 to 5 feet apart. In living rooms, they offer even ambient light without creating shadows or hot spots. Bedrooms benefit from the softer light distribution compared to smaller fixtures, which can feel too focused.
Canless designs shine in remodel situations. Cutting a hole for a traditional recessed can in an existing ceiling means dealing with insulation, fire blocking, and limited access. With canless fixtures, installers cut a single 6¼ inch hole, feed the wiring, and clip the unit in place. No attic access is strictly necessary if junction boxes are already present, though it’s still recommended for inspecting wiring paths.
Energy efficiency is another draw. A typical 6 inch canless LED uses 12 to 18 watts to produce the same light as a 65-watt incandescent in an old-style can. Over a fixture’s lifespan, that’s hundreds in energy savings, especially in rooms with multiple lights.
Top Features to Look for in 6 Inch Canless Fixtures
Color temperature adjustability has become standard on mid-range and premium units. Look for fixtures offering 2700K, 3000K, 3500K, 4000K, and 5000K settings via a switch on the fixture or a remote. This lets homeowners match lighting to room function, warm tones for bedrooms, cooler daylight for garages or utility spaces.
Lumens output matters more than wattage. For general lighting, aim for 800 to 1,000 lumens per fixture in living areas. Kitchens may benefit from higher output (1,000 to 1,200 lumens), while hallways and closets work fine at 650 to 800 lumens. Dimmability is essential, ensure compatibility with the dimmer switch type (leading-edge or trailing-edge). Not all canless LEDs dim smoothly: check manufacturer specs.
Beam angle affects light distribution. Most 6 inch canless fixtures use a 110 to 120 degree flood beam, which works well for general lighting. Narrower beams (60 to 90 degrees) create more defined pools of light, useful for accent or task lighting but less ideal for ambient applications.
Fire rating and IC rating should be confirmed even though canless designs run cool. The fixture should meet UL1598 standards and be rated for direct insulation contact. For retrofit installations in older homes, verify the junction box or quick-connect meets current NEC Article 314 requirements.
Finally, consider ease of installation. Spring-clip designs install fastest but require solid drywall (½ inch minimum). Junction box models take slightly longer but offer better support in ceilings with irregularities or older lath-and-plaster construction.
Installation Guide: How to Install 6 Inch Canless Recessed Lighting
Before starting: Turn off power at the breaker and verify it’s off with a non-contact voltage tester. Check local codes, some jurisdictions require permits for adding new lighting circuits or modifying existing ones. Wear safety glasses when cutting drywall overhead.
Step-by-Step Installation
-
Plan layout and mark locations. Space fixtures 4 to 6 feet apart for even coverage. Position them at least 18 inches from walls to avoid dark edges. Use a stud finder to avoid joists.
-
Cut the ceiling hole. Most 6 inch canless fixtures need a 6¼ inch hole. Use a drywall saw or hole saw. From above (if attic access is available), confirm clearance of 3 inches minimum around the cutout for the fixture housing.
-
Run wiring to the location. Use 14/2 NM-B cable (15-amp circuit) or 12/2 NM-B (20-amp circuit) depending on load. If adding to an existing circuit, confirm total wattage doesn’t exceed 80% of breaker capacity. Staple cable within 8 inches of boxes and every 4½ feet along runs.
-
Install junction box or use quick-connect. If the fixture requires a junction box, mount it to a joist or use an adjustable bar hanger rated for ceiling fans (overkill for recessed lights but code-compliant). For quick-connect models, follow manufacturer instructions, some use push-in connectors, others require wire nuts.
-
Connect the fixture. Match black to black (hot), white to white (neutral), and ground to ground. Push excess wire into the ceiling cavity. Some fixtures have a separate driver box that mounts above the ceiling: orient it so heat can dissipate.
-
Secure the fixture. For spring-clip models, compress the clips and push the fixture into the hole until it sits flush. For screw-mount models, align screw holes with the junction box and tighten until snug, don’t overtighten, which can crack the trim.
-
Restore power and test. Flip the breaker, turn on the switch, and check for flicker or dimming issues. If the fixture has adjustable settings, cycle through color temperatures to confirm operation.
Pro tip: If installing multiple fixtures on the same circuit, wire them in a daisy-chain from the switch to each fixture in sequence. This keeps wire runs organized and makes troubleshooting easier.
When to call a pro: If the circuit needs to be extended from the panel, if aluminum wiring is present, or if the ceiling is vaulted with limited access, hire a licensed electrician. Permit requirements vary, some areas allow homeowner installs, others don’t.
Best Applications and Room Placement
Kitchens benefit from 6 inch canless lights positioned over countertops, islands, and sinks. Place fixtures 18 to 24 inches from the wall to wash cabinets with light without creating shadows. Space them 4 feet apart along the counter for even task lighting. Pair with under-cabinet strips for layered illumination.
Living rooms and family rooms work best with a grid or perimeter layout. Avoid centering a single fixture, it creates a spotlight effect. Instead, use four to six fixtures spaced evenly. Dimming capability is essential here to shift from bright task lighting to softer ambient light for TV watching.
Bedrooms benefit from three to four fixtures depending on size. Position them away from the bed to avoid harsh overhead light directly above sleeping areas. Consider placing fixtures over dressers, closets, or reading nooks.
Bathrooms require moisture-rated fixtures (look for damp or wet location ratings, depending on proximity to showers). A pair of 6 inch canless lights flanking a mirror provides better illumination than a single overhead fixture, reducing shadows on faces.
Hallways and stairways need fixtures every 6 to 8 feet to eliminate dark spots. In stairways, position lights at the top and bottom, and add intermediate fixtures on long runs to meet code requirements for adequate illumination.
Avoid installing recessed lights directly above seating areas in media rooms, they create glare on screens. Instead, use wall-washing placement or combine recessed lights with sconces or floor lamps.
Common Mistakes to Avoid
Ignoring thermal protection. Even though canless LEDs run cool, covering them with insulation that blocks airflow around the driver can shorten lifespan. Maintain a few inches of clearance if possible, or confirm the fixture is rated for direct burial in insulation.
Mismatching dimmers. Not all LED-compatible dimmers work smoothly with every canless fixture. Flickering at low levels or buzzing sounds indicate incompatibility. Check the fixture manufacturer’s list of recommended dimmers, Lutron and Leviton models are generally safe bets, but verify.
Overlighting. More fixtures don’t always mean better lighting. Too many 6 inch lights in a small room creates a commercial, sterile feel. Use a lighting calculator or rule of thumb: 20 lumens per square foot for living areas, 50 lumens per square foot for task areas like kitchens.
Cutting holes before checking above. Always verify joist and obstruction locations before cutting. Hitting a joist, HVAC duct, or electrical conduit mid-cut creates unnecessary patching work and wasted time.
Skipping the voltage test. Never assume power is off. Even if the breaker is labeled correctly, test the wiring with a non-contact voltage tester before touching bare wires. This simple step prevents shocks and potential electrocution.
Using incorrect wire gauge. Running 14-gauge wire on a 20-amp circuit violates NEC code and creates a fire hazard. Match wire size to breaker rating: 14 AWG for 15-amp, 12 AWG for 20-amp.
Conclusion
Six inch canless recessed lighting offers a practical, energy-efficient upgrade for nearly any room. With integrated LEDs, slim profiles, and straightforward installation, they’ve replaced traditional cans in most residential applications. Focus on proper spacing, fixture quality, and code compliance, and the result is decades of reliable, attractive lighting that modernizes any space without major renovation.

