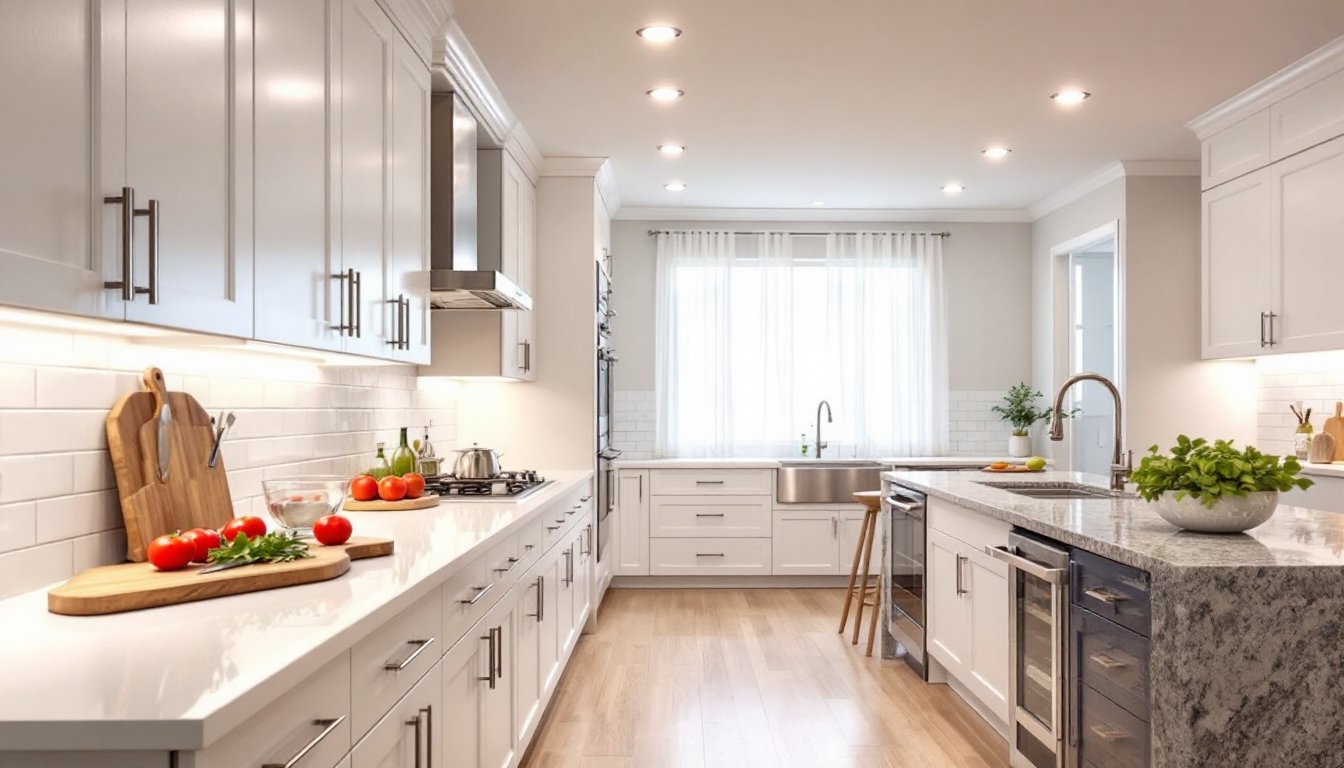
Recessed lighting transforms kitchens from dim, shadowy workspaces into bright, functional command centers. Unlike pendant lights or flush mounts that dangle or protrude, recessed fixtures sit flush with the ceiling, keeping sightlines clear and providing even, targeted illumination where it’s needed most, over counters, islands, and sinks. But not all recessed lights are created equal. Choosing the wrong color temperature can make food look unappetizing, insufficient lumens leave dark corners, and poor placement creates annoying shadows right where you’re chopping vegetables. This guide breaks down the best recessed lighting options for kitchens in 2026 and walks through the features, layout strategies, and practical considerations that separate a well-lit kitchen from a mediocre one.
Table of Contents
ToggleKey Takeaways
- Best recessed lighting for kitchens delivers 50-75 lumens per square foot for ambient lighting and 1,500-2,000 lumens per fixture for task areas over counters and islands.
- Choose color temperatures between 3000K-4000K: warm white (3000K) flatters traditional kitchens, while neutral to cool white (3500K-4000K) improves visibility for detailed cooking tasks.
- Proper spacing is critical—divide ceiling height by two to determine fixture placement, position lights 18-24 inches from wall cabinets, and center multiple lights over islands to eliminate shadows.
- IC-rated recessed lighting housings are required in insulated ceilings for fire safety, and dimmable LED fixtures with smooth dimming prevent flickering while allowing flexibility between ambient and task lighting.
- Quality LED recessed lights last 25,000-50,000 hours (15-20 years) while using only 8-15 watts, making them energy-efficient alternatives that reduce long-term costs compared to incandescent options.
- Top-rated budget-friendly options include Halo RL 4-inch ($15-$25), Lithonia WF4 ($20-$30), and Commercial Electric Ultra Slim ($10-$18), with premium smart home options like Philips Hue available for voice-controlled brightness and color adjustment.
Why Recessed Lighting Is Ideal for Kitchen Spaces
Recessed lighting, also called can lights or downlights, mounts inside the ceiling cavity, leaving only the trim ring visible. This design delivers several practical advantages for kitchens.
First, it maximizes headroom and eliminates visual clutter. In kitchens with standard 8-foot ceilings or awkward soffits, bulky fixtures eat up vertical space and create obstructions. Recessed lights stay out of the way, especially important over islands where people gather or in galley kitchens where every inch counts.
Second, they provide flexible, layered lighting. Kitchens demand task lighting (bright, focused beams for prep areas), ambient lighting (general illumination for the whole room), and sometimes accent lighting (highlighting backsplashes or open shelving). Recessed fixtures handle all three roles when planned correctly.
Third, modern LED recessed lights are energy-efficient and long-lasting. Quality LED units draw 8-15 watts while producing the equivalent of a 65-75 watt incandescent, and they’ll run 25,000 to 50,000 hours before needing replacement. That’s 15-20 years of daily use.
Finally, installation is straightforward in new construction or accessible ceiling cavities. Remodel housings (designed for retrofit work) simplify adding recessed lights to existing kitchens without tearing up drywall. Be aware that installing recessed lights in insulated ceilings requires IC-rated (insulation contact) housings to prevent fire hazards. Check local electrical codes, most jurisdictions follow the National Electrical Code (NEC), which mandates IC-rated fixtures where insulation is present.
Key Features to Consider When Choosing Kitchen Recessed Lights
Selecting recessed lighting isn’t about grabbing the cheapest six-pack at the hardware store. Several technical specs directly affect how the kitchen looks and functions.
Lumens, Color Temperature, and Dimming Capabilities
Lumens measure brightness output. For general kitchen lighting, aim for 50-75 lumens per square foot. A 150-square-foot kitchen needs 7,500-11,250 total lumens. If using six recessed lights, each fixture should deliver around 1,250-1,900 lumens. Task lighting over countertops and islands benefits from even higher lumen output, 1,500-2,000 lumens per fixture.
Color temperature, measured in Kelvin (K), determines the light’s appearance. Kitchens typically use 3000K-4000K. 3000K (warm white) creates a cozy, slightly yellowish glow that flatters skin tones and works well in traditional or transitional kitchens. 3500K-4000K (neutral to cool white) offers a crisper, whiter light that improves visibility for detailed tasks and suits modern aesthetics. Avoid going above 5000K unless the kitchen doubles as a commercial prep space, anything higher feels clinical.
Dimmability adds versatility. Not all LED recessed lights dim smoothly: cheaper models flicker or shut off abruptly at low settings. Look for fixtures explicitly labeled “dimmable” and pair them with an LED-compatible dimmer switch (standard incandescent dimmers often cause buzzing or strobing). Dimming capability allows homeowners to dial down brightness for ambient evening lighting or crank it up for detailed meal prep.
Trim Styles and Beam Angles for Different Kitchen Zones
Trim style affects both appearance and light distribution. Common options include:
- Baffle trim: The interior has ribbed rings that reduce glare, ideal for general ambient lighting.
- Reflector trim: Smooth, polished interior maximizes light output. Best for task lighting where brightness is a priority.
- Adjustable (eyeball) trim: The lamp can tilt or rotate, useful for accent lighting on backsplashes or artwork.
- Shower/wet-location trim: Sealed with a glass or plastic lens. Required if the recessed light is near a sink or in a kitchen adjacent to a steamy bathroom.
Beam angle determines how light spreads. Narrow beams (15-30 degrees) create focused spotlights, useful over islands or specific work zones but can leave dark gaps if spaced too far apart. Wide flood beams (60-90 degrees) provide even, overlapping coverage for general lighting. Most kitchens benefit from a mix: narrow beams for task zones, wide floods for ambient fill.
Consider trim size as well. Common diameters are 4-inch, 5-inch, and 6-inch. Larger trims deliver more light but require deeper ceiling cavities (typically 6-8 inches for the housing). 4-inch fixtures work well in standard residential ceilings and provide adequate illumination when spaced correctly.
Top-Rated Recessed Lighting Options for Kitchens in 2026
Here are proven recessed lighting choices suited to different kitchen needs and budgets.
Halo RL 4-inch LED Recessed Downlight is a popular remodel option. It installs without accessing the ceiling cavity, clips hold the housing in place from below. It delivers 650-750 lumens at 3000K or 4000K, dims smoothly with compatible switches, and is IC-rated. The integrated LED module lasts up to 50,000 hours. Ideal for retrofit projects in existing kitchens. Expect to pay around $15-$25 per fixture.
Lithonia Lighting WF4 LED offers excellent value for new construction or gut renovations. These 4-inch housings come with interchangeable trim rings (baffle or reflector) and produce 900 lumens at selectable color temperatures (toggle switch lets users choose 3000K, 3500K, or 4000K). They’re IC-rated and airtight, which helps with energy efficiency in insulated ceilings. Price runs $20-$30 per unit.
Juno LED Recessed Downlights (6-inch) suit kitchens needing higher lumen output. These deliver 1,200-1,400 lumens with a wide flood beam, making them effective for ambient and task lighting in larger kitchens. Available in remodel and new construction housings, with dimmable options and multiple color temperatures. They handle damp locations (near sinks) when specified. Pricing typically falls in the $30-$45 range.
Philips Hue White Ambiance Recessed Lights are the go-to for smart home integration. Users can adjust brightness and color temperature (2200K-6500K) via smartphone app or voice commands. They integrate with Amazon Alexa, Google Assistant, and Apple HomeKit. The flexibility to shift from warm evening light to bright task lighting with a voice command is convenient, but they’re pricier, around $60-$80 per fixture. Requires a Hue Bridge for full functionality.
Commercial Electric Ultra Slim LED is a budget-friendly retrofit option. These ultra-thin fixtures (less than 1 inch deep) work in ceilings with minimal clearance, such as below finished second floors. They produce 650-900 lumens at 3000K or 4000K, are IC-rated, and install quickly with spring clips. Output and build quality don’t match premium brands, but at $10-$18 per light, they’re practical for cost-conscious projects.
When selecting fixtures, verify they’re Title 24 compliant (California’s energy code) or Energy Star certified if applicable in the region. Both certifications ensure efficiency and quality standards.
How to Plan Your Kitchen Recessed Lighting Layout
Layout determines whether the kitchen is evenly lit or plagued by shadows and glare. Follow these guidelines for functional results.
1. Map out zones. Divide the kitchen into task zones (countertops, island, sink), ambient zones (general walkways, dining areas), and accent zones (backsplash, open shelves). Assign fixtures to each zone based on purpose.
2. Calculate spacing. A common rule of thumb: divide ceiling height by two to determine spacing in feet. For an 8-foot ceiling, fixtures should be roughly 4 feet apart. This prevents dark spots between lights. For task lighting, closer spacing (2.5-3 feet) increases brightness over work surfaces.
3. Position lights 18-24 inches from wall cabinets. Placing fixtures too close to cabinets casts shadows on countertops. Positioning them 18-24 inches out ensures light hits the work surface at an effective angle.
4. Center lights over islands and peninsulas. For a 4-foot-wide island, place two recessed lights down the centerline, spaced evenly. Larger islands may need four or six lights arranged in two parallel rows.
5. Avoid placing lights directly above the sink unless the fixture is wet-location rated. Steam and splashing water can damage non-rated housings. If the sink is under a window, position lights to the sides instead.
6. Use a dimmer for every recessed lighting circuit. This allows adjustment for different tasks and times of day. If the kitchen has multiple zones (e.g., perimeter lighting and island lighting), put them on separate dimmer switches for independent control.
7. Check for obstructions before cutting holes. Run a stud finder to locate ceiling joists, HVAC ducts, and plumbing lines. Most recessed housings need 6-8 inches of clearance above the ceiling. If joists are 16 inches on center, plan fixture placement accordingly.
Permit and electrical considerations: Adding new circuits or extensive lighting typically requires an electrical permit. While swapping existing fixtures is often DIY-friendly, running new wiring through walls and ceilings should involve a licensed electrician unless the homeowner is comfortable with rough-in work and local codes. The NEC requires AFCI (arc-fault circuit interrupter) protection on kitchen circuits in many jurisdictions, consult local building officials.
Wear safety glasses when drilling ceiling holes and cutting drywall. Turn off power at the breaker before handling wiring. If working in an attic space above the kitchen, watch for exposed nails, low clearances, and insulation dust (a respirator is recommended).
Conclusion
Choosing the best recessed lighting for a kitchen comes down to matching lumen output, color temperature, and beam angles to how the space is used. Quality fixtures with smooth dimming, IC-rated housings, and proper spacing transform kitchens into well-lit, functional spaces. Whether retrofitting an older kitchen or building new, taking time to plan layout and select the right products pays off in better visibility, lower energy bills, and a more enjoyable cooking environment.

