A dimly lit walkway isn’t just uninviting, it’s a tripping hazard waiting to happen. Landscape path lighting solves both the practical problem of safe nighttime navigation and the aesthetic goal of highlighting outdoor spaces after dark. Whether guiding guests from the driveway to the front door or illuminating a garden trail, well-placed pathway outdoor lighting extends the usability of outdoor areas while boosting curb appeal and property value. This guide walks through fixture selection, design strategies, installation methods, and upkeep so homeowners can confidently tackle a path lighting project without hiring out every detail.
Table of Contents
ToggleKey Takeaways
- Landscape path lighting improves both safety and curb appeal by eliminating trip hazards, deterring unauthorized entry, and highlighting outdoor features—features real estate agents recommend before listing homes.
- Choose between low-voltage LED systems for consistent brightness and reliability or solar path lights for ease of installation and flexibility, with hybrid systems combining both for optimal results across different landscape areas.
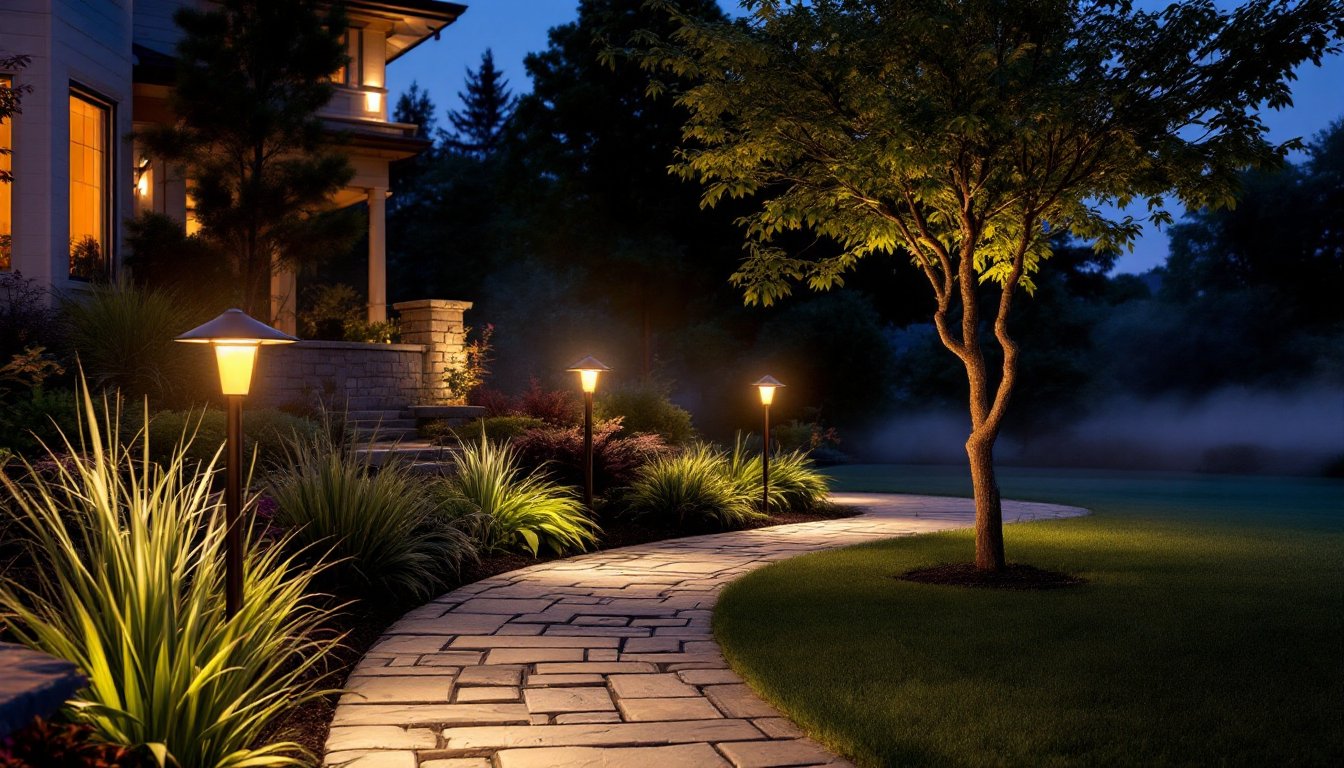
- Effective pathway outdoor lighting uses downward-facing fixtures spaced 6 to 15 feet apart depending on height, warm white color temperature, and layered lighting techniques to avoid a monotonous runway effect.
- Proper installation of low-voltage systems requires burying cable 6 to 12 inches deep with waterproof connectors, testing voltage at all points to check for voltage drop, and verifying transformer capacity before backfilling.
- Routine maintenance every 3 to 6 months—cleaning lenses, checking wire connections, and trimming vegetation—combined with annual battery replacements and timer adjustments keeps your path lighting system performing reliably for years.
What Is Landscape Path Lighting and Why Does It Matter?
Landscape path lighting refers to low-voltage or solar-powered fixtures installed along walkways, driveways, garden paths, and other pedestrian routes to provide illumination and visual interest. Unlike overhead floodlights that wash entire yards in harsh light, outdoor path lighting targets specific areas with focused, downward-facing beams, typically 50 to 150 lumens per fixture.
The primary function is safety. Uneven pavers, tree roots, steps, and grade changes become invisible after sunset. Path lights eliminate these trip hazards and deter unauthorized entry by removing dark corners near entryways. Many municipalities and homeowner associations require adequate outdoor lighting for liability reasons, especially on rental properties.
Secondary benefits include aesthetics and property value. Pathway landscape lighting draws the eye through a landscape, emphasizing plantings, hardscaping, and architectural features. Real estate agents often recommend adding path lighting before listing a home: according to the National Association of Home Builders, outdoor lighting ranks among the top ten features desired by buyers.
Finally, path lighting extends the functional hours of outdoor spaces. Decks, patios, and gardens become usable well past dusk when connecting walkways are safely lit. Homeowners who invest in quality landscape pathway lighting often see increased use of outdoor areas year-round.
Types of Path Lighting Fixtures for Every Landscape Style
Choosing the right fixture depends on landscape style, budget, existing electrical infrastructure, and maintenance tolerance. Common fixture styles include:
- Bollard lights: Vertical posts ranging from 18 to 42 inches tall with integrated LED or halogen bulbs. Best for modern or contemporary landscapes. Taller bollards work well along driveways or wide garden paths.
- Mushroom or pagoda lights: Compact fixtures with hooded tops that direct light downward, minimizing glare. Ideal for traditional or cottage-style gardens. Heights typically range from 8 to 20 inches.
- Tier or lantern lights: Multi-level fixtures that cast ambient light in all directions. These work well for transitional landscapes but can create light pollution if not shielded properly.
- Flush or recessed path lights: In-ground fixtures installed flush with paving or lawn. Often used along pool decks or modern hardscapes. Require careful drainage planning to prevent water intrusion.
Material choice affects longevity and appearance. Copper and brass develop a natural patina and resist corrosion, making them suitable for coastal or high-humidity climates. Powder-coated aluminum offers corrosion resistance at a lower price point but may fade over time. Stainless steel delivers a sleek, modern look with excellent durability. Avoid cheap plastic housings: UV exposure causes cracking within two to three seasons.
LED vs. Solar Path Lights: Choosing the Right Power Source
Low-voltage LED systems (typically 12V) connect to a transformer plugged into a standard 120V outdoor outlet protected by a GFIP circuit. LEDs consume 1 to 3 watts per fixture, last 25,000 to 50,000 hours, and deliver consistent brightness. Installation requires running 12- or 14-gauge landscape wire underground (bury at least 6 inches deep per NEC Article 411). Total run length matters, voltage drop over distance dims fixtures at the far end. Calculate wire gauge and run length using manufacturer charts: runs over 100 feet may require 10-gauge wire or a separate transformer.
Solar path lights require no wiring. Each fixture contains a small photovoltaic panel, rechargeable battery (usually NiMH or lithium-ion), and LED. They’re ideal for remote areas without nearby outlets or for renters who can’t modify electrical systems. But, performance depends on sun exposure, shaded paths won’t charge adequately. Battery life typically ranges from two to four years, after which the batteries must be replaced. Cheaper solar lights (under $15 per fixture) often produce weak, inconsistent light and fail within one season. Budget at least $30 to $50 per quality solar fixture with replaceable batteries and weather-resistant housing.
Hybrid systems combine wired and solar lights. Use wired LED fixtures along primary walkways where consistent brightness matters, and supplement with solar units in secondary garden paths where ambiance outweighs visibility.
Design Principles for Effective Path Lighting Placement
Effective pathway outdoor lighting balances visibility, aesthetics, and energy efficiency. The goal isn’t to replicate daylight but to provide enough illumination to navigate safely while creating visual interest.
Downward-facing fixtures minimize glare and light pollution. Aim for fixtures that direct 80% or more of their light toward the ground. Upward or side-spill light creates glare that reduces night vision and annoys neighbors. Use fixtures with integrated shields or louvers.
Layer lighting types. Combine path lights with other landscape lighting, uplighting on trees, downlighting from eaves, or accent lights on focal points. This layering creates depth and prevents the “runway effect” where a single line of identical fixtures looks monotonous.
Match light color temperature to the setting. Warm white (2700K to 3000K) suits traditional gardens and residential landscapes. Neutral white (3500K to 4000K) works for modern hardscapes. Avoid cool white (5000K+) in residential settings, it feels harsh and institutional.
Use fixtures to define borders and decision points. Place lights at the start and end of paths, at intersections, and on either side of steps. These decision points need brighter illumination (100 to 150 lumens) than mid-path fixtures (50 to 80 lumens).
Spacing and Height Guidelines
Spacing depends on fixture height, beam spread, and ambient light. As a general rule:
- Fixtures 8 to 12 inches tall: space 6 to 8 feet apart along paths 3 to 4 feet wide.
- Fixtures 18 to 24 inches tall: space 8 to 10 feet apart.
- Bollards 30+ inches tall: space 10 to 15 feet apart.
Narrow these intervals on curved paths, near steps, or in areas with no ambient light from nearby buildings. Wider spacing works along straight paths or where streetlights provide supplemental illumination.
Height affects both glare and coverage. Shorter fixtures concentrate light closer to the fixture, ideal for narrow garden paths. Taller fixtures spread light over a wider area but can cause glare if not properly shielded. Test a few fixtures before committing to full installation, stake them in place, turn them on at night, and walk the path from both directions to check for glare.
Avoid over-lighting. More fixtures don’t always mean better results. Over-lit paths feel commercial rather than inviting. Aim for pools of light with subtle shadows in between, guiding movement without flooding every square foot.
Installation Tips for DIY and Professional Path Lighting
Most homeowners can install low-voltage landscape pathway lighting in a weekend with basic tools: a trenching shovel or flat spade, wire strippers, waterproof wire connectors (grease-filled twist-on or heat-shrink types), a voltage tester, and a mallet or rubber hammer for staking fixtures.
Step-by-step for low-voltage LED systems:
- Plan the layout. Mark fixture locations with stakes or spray paint. Measure total cable run and count fixtures to size the transformer. Most transformers range from 100 to 300 watts: divide total wattage by fixture wattage to confirm capacity. Leave 20% overhead, don’t max out the transformer.
- Install the transformer near a GFCI-protected outlet. Mount it at least 12 inches above grade to prevent water intrusion. If using a timer or photocell, position the sensor where it won’t be blocked by eaves or foliage.
- Bury the cable. Dig a trench 6 to 8 inches deep along the path. In areas subject to frost heave, go 10 to 12 inches. Lay 12- or 14-gauge direct-burial landscape wire (not standard extension cord, it’s not rated for underground use). Loop extra wire at each fixture location to allow for future repositioning.
- Connect fixtures. Strip 1/2 inch of insulation from the main cable at each fixture location (don’t cut the cable, just strip a small section). Attach the fixture’s lead wires using waterproof connectors. Some fixtures use quick-connect clamps that pierce the cable insulation, these are faster but can corrode over time. Grease-filled connectors offer better long-term reliability.
- Test before backfilling. Plug in the transformer and verify that all fixtures illuminate. Use a multimeter to check voltage at the first, middle, and last fixture. Voltage should be within 10% of the transformer output (e.g., 10.8V to 13.2V on a 12V system). If the last fixture reads below 10.5V, upsize the wire gauge or shorten the run.
- Backfill and compact. Replace soil and tamp firmly to prevent settling. Mark cable locations on a property map, future shovel work can sever buried wires.
For solar lights, installation is simpler: push the stake into softened soil (water the area first if the ground is hard) and position the panel to face south (in the Northern Hemisphere) with no shade from mid-morning to mid-afternoon.
When to hire a pro: If the project involves tapping into 120V circuits, installing new outdoor outlets, running conduit under driveways, or integrating lighting controls with home automation systems, hire a licensed electrician. Permit requirements vary by jurisdiction, check with the local building department before digging or wiring.
Maintenance and Troubleshooting Your Path Lighting System
Routine maintenance extends the life of any outdoor path lighting system and keeps it performing at full brightness.
Every 3 to 6 months:
- Clean lenses and fixtures. Dirt, pollen, and spider webs reduce light output by 30% or more. Wipe lenses with a damp cloth and mild detergent. Avoid abrasive cleaners that scratch polycarbonate or acrylic lenses.
- Check wire connections. Moisture infiltration corrodes connections and causes flickering or dead fixtures. Re-seal any connections showing green corrosion with fresh waterproof connectors.
- Trim vegetation. Overgrown plants block solar panels and shade low-voltage fixtures. Keep a 12-inch clearance around each fixture.
Annually:
- Test and adjust the transformer timer or photocell. Seasonal daylight shifts may require reprogramming. Photocells can become dirty or fail, wipe the sensor or replace if lights stay on during the day.
- Replace solar batteries. Most NiMH and lithium-ion batteries last two to four years. Reduced runtime (lights dimming after a few hours) indicates battery degradation. Use manufacturer-specified replacements, mismatched batteries can damage the charging circuit.
- Inspect stakes and mounts. Frost heave, foot traffic, and lawn equipment can shift or damage fixtures. Re-stake loose fixtures and replace cracked housings.
Common troubleshooting:
- Fixtures dim toward the end of the run: Voltage drop. Upsize wire gauge or add a second transformer midway.
- One or two fixtures out, rest work fine: Check individual connections. Replace the bulb if the fixture allows, or swap the fixture with a working one to isolate the problem.
- All fixtures dim or flicker: Transformer overload or failing transformer. Check total wattage and replace the transformer if it’s running hot or humming.
- Solar lights weak or won’t charge: Verify panel orientation, clean the panel surface, and replace the battery. Shaded locations may need relocation or a switch to wired fixtures.
Winter prep: In freeze-prone climates, some homeowners disconnect and store solar fixtures to prevent battery damage from extreme cold. Low-voltage LED systems can remain in place year-round, LEDs tolerate temperature swings better than incandescent or halogen bulbs.
By following these maintenance steps, a well-installed landscape path lighting system will deliver years of reliable performance, keeping walkways safe and attractive from dusk to dawn.

