Recessed lighting transforms cluttered ceiling fixtures into sleek, flush-mounted illumination that opens up any room. Whether renovating a cramped kitchen or upgrading a dated living room, homeowners find recessed lights deliver both function and modern aesthetics. Unlike hanging pendants or bulky surface-mount fixtures, recessed cans disappear into the ceiling plane while casting adjustable, targeted light exactly where it’s needed. This guide walks through the essential decisions, fixture types, room-specific selection, layout planning, and installation realities, so anyone can confidently add recessed lighting without expensive mistakes or code violations.
Table of Contents
ToggleKey Takeaways
- Ceiling recessed lighting eliminates visual clutter while providing targeted, adjustable illumination that works in any interior style from farmhouse to modern.
- LED recessed lights consume 88% less energy than incandescent bulbs, with modern fixtures lasting 25,000–50,000 hours and saving thousands of kWh over their lifespan.
- Proper spacing using the ceiling-height formula (height ÷ 2) prevents dark corners and glare; sketch your layout on graph paper and locate joists before cutting any holes.
- Room-specific selection matters: kitchens need 650–900 lumens with cool 3000K–4000K color, while living rooms benefit from warmer 2700K tones and lower lumens for relaxed ambiance.
- DIY remodel-style installation is achievable for basic replacements, but hire a licensed electrician for new circuits, aluminum wiring, or complex ceiling structures to ensure code compliance.
- Recessed fixtures increase home value, improve space efficiency in low-ceiling rooms, and allow aesthetic flexibility through interchangeable trim styles without fixture replacement.
What Is Ceiling Recessed Lighting and How Does It Work?
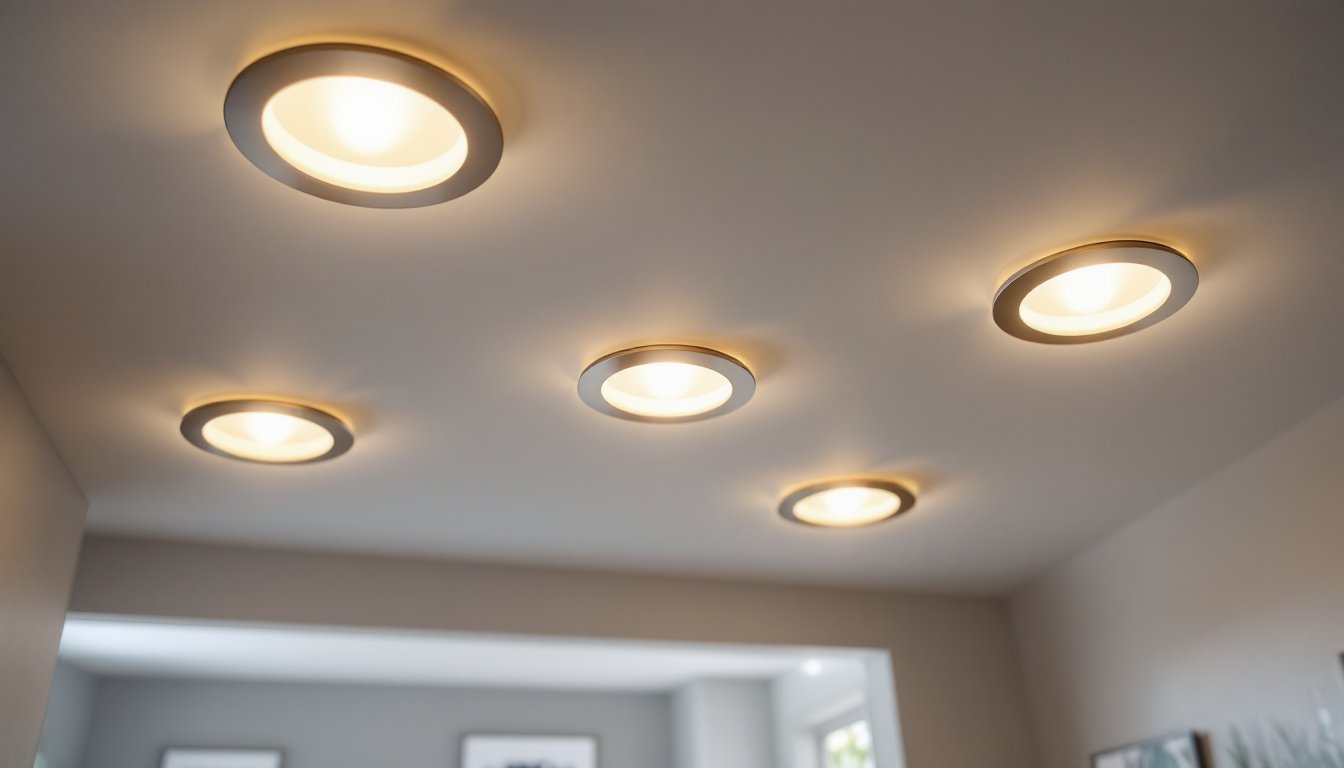
Recessed lighting consists of light fixtures installed inside the ceiling cavity, with only the trim ring and bulb visible from below. The term “can light” refers to the cylindrical housing that mounts between joists or trusses in the ceiling structure.
Three main components make up a recessed fixture: the housing (the metal can that holds electrical connections and mounts to framing), the trim (the decorative ring and reflector visible from below), and the bulb or lamp (LED integrated units or replaceable bulbs). The housing comes in remodel or new construction types, remodel housings use adjustable clips to grip finished drywall from below, while new construction cans nail directly to exposed joists before drywall installation.
Electrically, most recessed lights connect to standard 120V household circuits. Fixtures must meet IC (Insulation Contact) or non-IC ratings depending on insulation proximity. IC-rated cans can touch insulation safely, while non-IC fixtures require 3-inch clearance, critical for attic fire safety and code compliance. Airtight-rated housings prevent conditioned air from escaping into attics, which matters in energy-conscious builds or renovations.
Modern LED recessed lights typically draw 8–15 watts while producing light equivalent to old 65–90 watt incandescent bulbs. Integrated LED units last 25,000–50,000 hours, eliminating bulb changes for 15+ years under typical residential use.
Key Benefits of Installing Recessed Lighting in Your Home
Recessed fixtures solve multiple design and functional challenges in a single installation.
Space efficiency ranks first. Rooms with low ceilings (under 8 feet) benefit most, as flush-mounted lights don’t reduce headroom or create visual clutter. Basements, hallways, and closets gain usable ceiling height compared to surface fixtures that hang 4–6 inches down.
Targeted task lighting puts lumens exactly where needed. Unlike central ceiling fixtures that spread diffuse light, recessed cans direct beams onto countertops, reading chairs, or artwork. Adjustable “eyeball” trims pivot up to 30 degrees to highlight specific zones.
Aesthetic flexibility allows homeowners to change décor without updating fixtures. Since only a small trim ring shows, recessed lights complement any style from farmhouse to ultra-modern. Dimmable LED units adjust ambiance from bright task lighting to soft evening glow without installing new hardware.
Energy savings add up quickly. A kitchen that once used six 100-watt incandescent bulbs (600 watts total) can achieve similar brightness with six 12-watt LED recessed lights (72 watts total), an 88% reduction in power consumption. Over 25,000 hours (typical LED lifespan), that saves roughly 2,100 kWh at average residential rates.
Increased home value follows bathroom and kitchen updates featuring recessed lighting. Appraisers recognize modern electrical upgrades, and buyers notice updated fixtures during showings.
Types of Recessed Lighting Fixtures and Trim Styles
Choosing the right fixture type depends on installation context and existing ceiling structure.
Housing Types
New construction housings nail or screw to exposed joists before drywall goes up. These provide the most secure mounting and best access for running wire, but require removing ceiling material in retrofit applications.
Remodel (retrofit) housings install through a finished ceiling via a hole saw cut. Spring clips or friction tabs grip the drywall from above, requiring no attic access in many designs. Ideal for adding lights to existing rooms without major demolition.
Shallow-depth or “wafer” lights mount in ceilings with only 2–3 inches of clearance (standard cans need 6–8 inches). These ultra-thin integrated LED units work in ceilings below concrete slabs or where ductwork limits space.
Trim Styles
Baffle trim features concentric grooves inside a white or black cone that reduces glare. Best for general room lighting in living areas and bedrooms.
Reflector trim uses smooth, mirror-like interiors (often white or metallic) to maximize light output. Ideal for task areas like kitchens and garages where brightness matters more than glare control.
Eyeball or gimbal trim allows the bulb to pivot, directing light at angles. Perfect for highlighting artwork, accent walls, or architectural features.
Shower/wet-location trim includes a sealed glass or acrylic lens. Required by NEC (National Electrical Code) for fixtures installed in tubs, showers, or covered outdoor soffits.
Open trim leaves the bulb exposed, creating a more industrial or minimal look. Works best with decorative vintage-style LED bulbs in lofts or modern kitchens.
Most housings accept interchangeable trims, allowing homeowners to change the look without replacing the can itself.
How to Choose the Right Recessed Lights for Each Room
Room function dictates fixture specifications, lumens, color temperature, beam angle, and dimming capability.
Kitchens require high lumens (650–900 per fixture) with 3000K–4000K color temperature (neutral to cool white) for accurate color rendering while prepping food. Use 4-inch or 6-inch cans spaced 4–5 feet apart over counters and islands. Dimmable fixtures let homeowners shift from bright task lighting during meal prep to softer ambient light during dining.
Living rooms and bedrooms benefit from warmer 2700K–3000K color temperatures that create relaxed atmospheres. Lower lumens per fixture (400–600) work well when paired with layered lighting like table lamps or wall sconces. Space fixtures 6–8 feet apart for even ambient coverage, or cluster them over seating areas for reading.
Bathrooms need wet-location-rated trim in shower zones, with 3000K–4000K temperatures for grooming tasks. Install fixtures symmetrically around mirrors to eliminate shadows on faces, single overhead lights cast unflattering shadows under eyes and chins.
Hallways work best with 3-inch or 4-inch cans spaced 4–6 feet on center down the corridor. Lower wattage (8–10 watts) prevents harsh glare in narrow spaces.
Home offices demand 5000K–6500K daylight color temperatures that reduce eye strain during computer work. Pair recessed lights with desk lamps for layered task lighting, positioning cans to minimize screen glare.
All rooms benefit from dimmable LED drivers. Check compatibility between dimmer switches and LED fixtures, not all LEDs dim smoothly without flicker. Look for “TRIAC-dimmable” or “ELV-compatible” labels.
Planning Your Layout: Spacing and Placement Best Practices
Poor spacing creates dark corners or glaring hot spots. Follow these field-tested guidelines to achieve balanced illumination.
General ambient lighting uses the formula: ceiling height ÷ 2 = spacing in feet. For standard 8-foot ceilings, space fixtures roughly 4 feet apart. In 10-foot ceiling rooms, increase spacing to 5 feet. This prevents overlapping pools of light while maintaining even coverage.
Wall-wash technique places fixtures 24–30 inches from walls to graze vertical surfaces with light, making rooms feel larger. Position the row parallel to the wall, maintaining consistent fixture-to-wall distance throughout.
Task lighting concentrates fixtures over work zones. In kitchens, place cans 18–24 inches from cabinet edges to illuminate countertops without shadows. For reading nooks or desks, center a fixture directly overhead or slightly forward of the seating position.
Avoid common mistakes: Don’t install fixtures too close to walls (under 18 inches), this creates scalloping shadows. Don’t space cans too far apart (over 6 feet in 8-foot ceilings), dark zones appear between fixtures. Check joist direction before finalizing layout: housings must fit between structural members or require additional framing.
Sketch the plan on graph paper before cutting holes. Mark joist locations with a stud finder, noting any obstacles like HVAC ducts, plumbing stacks, or existing wiring. A few minutes of planning prevents expensive drywall repairs.
Most building departments don’t require permits for replacing existing light fixtures, but adding new circuits or substantially increasing electrical load typically needs electrical permits and inspections. Verify local requirements before starting.
Installation Considerations: DIY vs. Professional Help
Installing recessed lighting ranges from straightforward remodel projects to complex new-circuit work requiring licensed electricians.
DIY-friendly scenarios include replacing existing ceiling fixtures with remodel-style recessed cans, especially when attic access makes wiring easy. Homeowners comfortable working with basic electrical (turning off breakers, connecting wires with wire nuts, testing with non-contact voltage testers) can handle single-room upgrades. Required tools: hole saw (4-inch or 6-inch depending on fixture size), drywall saw, wire strippers, screwdriver, stud finder, and voltage tester. Safety gear: safety glasses, gloves, dust mask, and sturdy ladder.
Key DIY steps: Turn off power at the breaker and verify with a tester. Cut precise holes using a hole saw at marked locations. Run 14/2 or 12/2 NM cable (depending on circuit amperage) between fixtures and switch, stapling within 8 inches of boxes per NEC requirements. Connect hot (black), neutral (white), and ground (bare copper) wires following fixture instructions. Secure housings, install trims, restore power, and test.
Hire a licensed electrician when:
- Installing lights requires running new circuits from the breaker panel
- The project involves aluminum wiring (common in 1960s–70s homes)
- Ceiling cavities contain knob-and-tube wiring
- Local codes mandate licensed work for any new electrical (some jurisdictions do)
- Attic access is impossible or the ceiling structure is unclear
- The homeowner lacks confidence working near live electrical panels
Permit requirements vary significantly. Most jurisdictions allow homeowners to replace fixtures without permits but require permits and inspections for new circuits. Unpermitted electrical work can void homeowner’s insurance and complicate future home sales.
Cost considerations: DIY material costs run $25–$60 per LED recessed light (housing and trim). Professional installation averages $100–$250 per fixture including labor, depending on complexity and regional rates. Difficult attic access or extensive patching increases costs.
Conclusion
Recessed lighting delivers unmatched versatility, efficiency, and modern aesthetics for nearly any room. By understanding fixture types, planning layouts methodically, and honestly assessing skill levels for installation, homeowners can transform spaces with professional results. Start with a detailed plan, measure twice, cut once, and don’t hesitate to call an electrician when the project exceeds comfort zones. The result is clean, energy-efficient illumination that enhances home value and daily living for decades.

