Antique outdoor lighting fixtures bring architectural character and warm ambiance that new construction simply can’t replicate. Whether flanking a craftsman bungalow’s front door or illuminating a garden path, these vintage pieces marry function with history. But sourcing, restoring, and wiring century-old fixtures requires more than just aesthetics, it demands understanding materials, electrical safety, and preservation techniques. This guide walks through identifying genuine antiques, popular historical styles, where to hunt for quality pieces, restoration essentials, and code-compliant installation methods to ensure these fixtures shine safely for decades to come.
Table of Contents
ToggleKey Takeaways
- Authentic antique outdoor lighting fixtures must be at least 100 years old and display hand-forged metal with visible tool marks, slotted screws, and uneven patina—features that distinguish genuine pieces from modern reproductions.
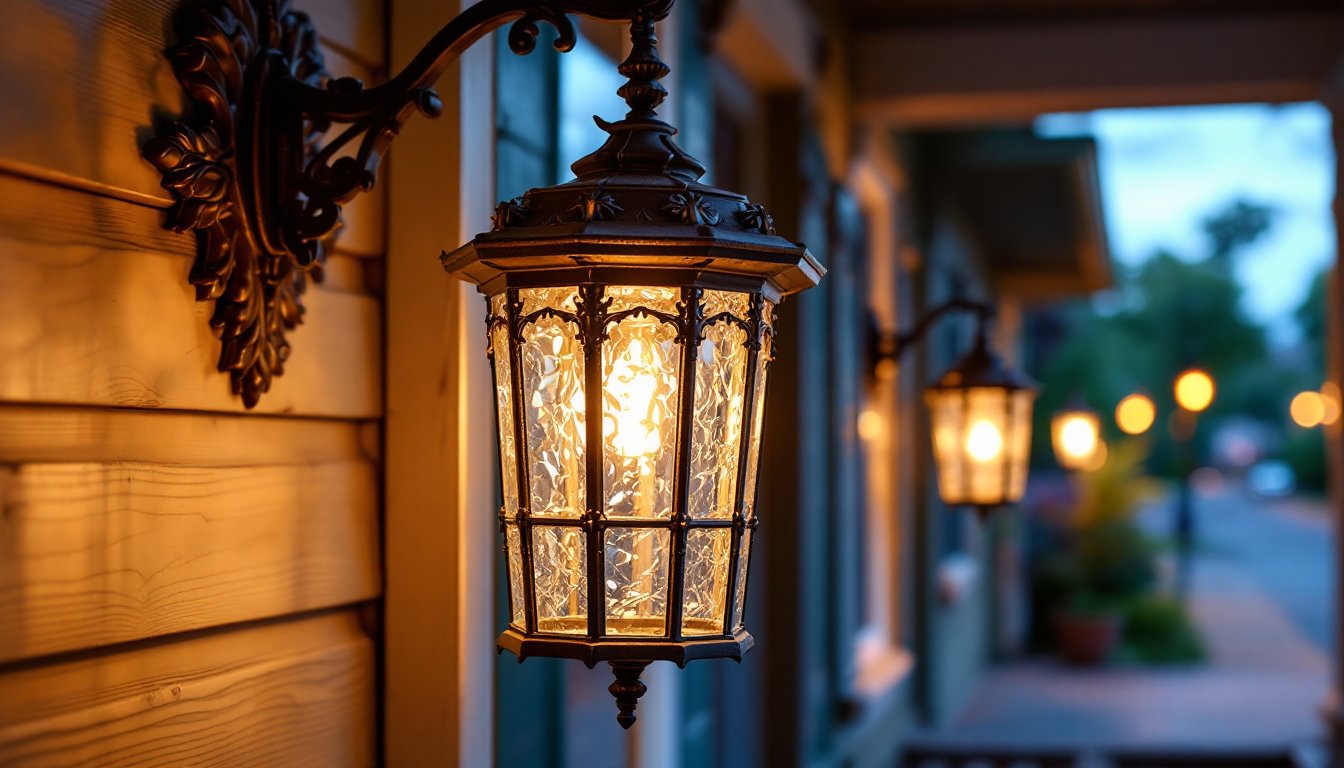
- Popular antique styles include Victorian and Edwardian lanterns with ornate cast iron or brass construction, Arts and Crafts fixtures featuring hand-hammered copper and wrought iron, and mission-style designs with slag glass panels that command premium prices.
- Source genuine antique outdoor lighting fixtures from architectural salvage yards for authenticated pieces with documentation, estate sales for below-retail opportunities, or specialty dealers in historic districts who provide restoration services.
- Rewiring is essential for safety since original cloth-wrapped wiring poses fire and shock hazards; use outdoor-rated UL-listed wire on GFCI-protected circuits and replace old sockets with weather-rated alternatives per NEC standards.
- Preserve original patina by sealing iron with clear paste wax and using wax-based products for brass and copper rather than aggressive polishing, as collectors value stabilized oxidation over artificially brightened finishes.
- Install fixtures securely into wall studs or framing with weatherproof boxes, rubber gaskets, and silicone caulk to prevent water intrusion, maintain proper electrical grounding, and scale the fixture proportionally—typically one-quarter the height of the wall section it illuminates.
What Makes Outdoor Lighting Fixtures Truly Antique?
The term “antique” gets tossed around loosely, but in collectibles circles, a fixture typically needs to be at least 100 years old to earn the label. Pieces from the 1920s and earlier, think gas-to-electric conversions, hand-forged iron lanterns, and early porcelain sockets, qualify as true antiques. Fixtures from the 1930s through 1960s fall into the “vintage” category, while anything newer is simply “used” or “retro-styled.”
Authentic antique outdoor fixtures share telltale construction markers. Look for hand-forged or cast metal (iron, brass, bronze, copper) with visible tool marks, irregularities, and patina that develops over decades of exposure. Screws will be slotted or square-drive, not Phillips-head (which wasn’t common until the 1930s). Glass shades often show bubbles, waves, or pontil marks from mouth-blown production. Wiring, if original, will be cloth-wrapped with rubber insulation, a fire hazard by modern standards and a clear sign the fixture needs rewiring.
Beware of reproductions. Modern castings are lighter, cleaner, and lack the wear patterns of genuine age. Manufacturers stamp country-of-origin codes post-1950s, so unmarked or foundry-stamped pieces suggest earlier manufacture. Oxidation on brass and copper should be uneven, concentrated in crevices where moisture collected. Uniformly aged finishes often signal artificial treatment.
Popular Styles of Antique Outdoor Lighting
Victorian and Edwardian Lanterns
Victorian-era fixtures (1837–1901) favored ornate cast iron or brass construction with decorative scrollwork, acanthus leaves, and finials. Many began as gas lanterns, later retrofitted for electric bulbs. Bracket-style wall lanterns with beveled or frosted glass panels were common, designed to cast ambient light while protecting flames from wind. Post-mounted fixtures featured large glass globes, often etched or colored, held by four-armed cast frames.
Edwardian designs (1901–1910) softened Victorian excess with cleaner lines but retained decorative elements. Copper lanterns gained popularity during this period, especially in coastal areas where the metal’s corrosion resistance proved valuable. Hurricane-style glass shades became standard, protecting early carbon-filament bulbs. Fixtures from this era often incorporated milk glass or opalescent diffusers to soften the harsh, flickering light of early electricity.
Arts and Crafts Movement Fixtures
Reacting against industrial mass production, Arts and Crafts lighting (1880s–1920s) emphasized hand-hammered copper, bronze, and wrought iron with visible craftsmanship. Designers like Gustav Stickley and Dirk Van Erp created outdoor lanterns with organic forms, exposed rivets, and mica or amber glass panels that created warm, natural light.
These fixtures typically feature simple geometric shapes, square or cylindrical lanterns with exposed joinery and minimal embellishment. Hardware is deliberately visible, celebrating the maker’s skill. Patina is key to Arts and Crafts aesthetics: original pieces show rich brown and green oxidation on copper, while iron develops dark, matte rust that’s often stabilized with wax finishes. Mission-style porch lights with slag glass panels, marbled colored glass, are particularly sought after and command premium prices when complete and original.
Where to Find Authentic Antique Outdoor Lighting Fixtures
Architectural salvage yards remain the gold standard for authentic fixtures. These businesses dismantle period homes slated for demolition, preserving original hardware, lighting, and trim. Expect to pay more than at flea markets, but pieces are typically authenticated and salvage yards often provide provenance documentation. Staff can usually identify age, manufacturer, and original application.
Estate sales and auctions offer opportunities to acquire high-quality fixtures below retail, particularly in older neighborhoods where homes are being updated or cleared. Arrive early to inspect items closely, bring a flashlight, magnet (to distinguish ferrous metals), and measuring tape. Check for completeness: missing glass, mounting hardware, or electrical components reduce value and increase restoration costs.
Online marketplaces like 1stDibs, Chairish, and Ruby Lane specialize in authenticated antiques with detailed listings, though prices reflect dealer markups and condition grading. eBay and Facebook Marketplace demand more skepticism but can yield finds if you’re willing to sort through reproductions. Search specific terms like “original gas lantern,” “Victorian porch light,” or “Arts and Crafts copper fixture” rather than generic queries.
Specialty dealers and restoration shops often stock outdoor lighting, particularly in regions with historic districts. They’ve usually addressed major restoration needs, rewiring, glass replacement, stabilization, so fixtures are closer to install-ready. Some dealers also broker custom restoration or replica work when originals are unattainable or excessively worn.
Restoration and Maintenance Tips for Antique Fixtures
Start with a condition assessment before cleaning or disassembly. Document the fixture with photos from multiple angles, noting existing finishes, missing parts, and wiring condition. Original patina has value, collectors and preservationists prefer stabilized oxidation over polished-to-new finishes. For iron, brush off loose rust with a soft wire brush, then seal with clear paste wax or penetrating oil (like Penetrol or boiled linseed oil) to arrest further corrosion without stripping character.
Brass and copper fixtures benefit from gentle cleaning with mild soap and water, followed by a soft towel dry. Avoid abrasive polishes unless the goal is full restoration to bright metal: instead, use wax-based products like Renaissance Wax to protect the existing patina. For heavily tarnished pieces where brightening is desired, use a non-ammonia brass cleaner and test on an inconspicuous area first.
Rewiring is non-negotiable. Original cloth-wrapped wiring degrades and poses serious fire and shock hazards. This job requires basic electrical skills, if unfamiliar with wire stripping, grounding, and making secure connections, hire a licensed electrician. Use UL-listed 14- or 16-gauge wire rated for outdoor use (look for UV-resistant jackets). Fixtures mounted outdoors must be on GFCI-protected circuits per NEC Article 210.8. Replace old sockets with UL-listed porcelain or brass sockets rated for outdoor use. If the fixture originally used gas and has open ventilation holes, consider whether moisture intrusion will be an issue: some restorers seal these with clear epoxy or replace panels.
Glass panels and shades require delicate handling. Hairline cracks can be stabilized with clear epoxy applied with a toothpick, then clamped lightly while curing. Severely damaged glass often can’t be repaired: search salvage yards, antique lamp suppliers, or glassblowers who specialize in reproduction shades. When reinstalling glass, use new gaskets or flexible glazing compound rather than forcing old brittle materials back into place.
Installing Antique Outdoor Lighting Safely and Effectively
Before mounting any vintage fixture, confirm its weight and mounting requirements. Cast iron lanterns can weigh 20–40 pounds: wall boxes and mounting brackets must be fastened into solid framing, not just siding or stucco. Use a stud finder to locate wall studs or a joist behind the soffit for porch lights. If the existing electrical box is a lightweight plastic “old work” box, replace it with a metal weatherproof box rated for the fixture’s weight, secured with screws into framing.
Weatherproofing is critical. Install a rubber gasket between the fixture’s mounting plate and the wall to prevent water intrusion behind siding. Use silicone caulk around the perimeter, but leave the bottom edge open for drainage, trapped moisture accelerates rust. Fixtures should have a slight downward tilt (about 5 degrees) to shed water away from joints and sockets.
Electrical connections for outdoor fixtures must meet NEC standards. All wire splices happen inside the weatherproof box using twist-on wire connectors rated for outdoor use or push-in connectors, never exposed. Ground the fixture properly, run a green or bare copper ground wire from the box ground screw to the fixture’s ground terminal or metal body. If the fixture lacks a ground terminal and is all-metal, the mounting bracket must provide metal-to-metal contact with the grounded box. Use outdoor-rated LED bulbs for longevity and lower heat output, which reduces stress on old sockets and glass.
Many jurisdictions require permits for exterior electrical work, particularly if you’re adding new circuits or replacing service panels. Check with local building departments before starting. If the project involves running new wire through walls or installing exterior junction boxes, hire a licensed electrician unless you’re confident in code-compliant methods.
Safety gear: Wear gloves when handling rusty or sharp metal edges, safety glasses when drilling into masonry or stucco, and turn off power at the breaker, not just the switch, before connecting wiring. Use a non-contact voltage tester to confirm the circuit is dead before touching any wires. When working on ladders near power lines or at heights above eight feet, have a helper stabilize the ladder and hand tools up rather than overreaching.
Finally, consider the fixture’s proportions and placement. A Victorian lantern that suited a sprawling estate may overwhelm a modest cottage. Scale matters, fixture height should be roughly one-quarter the height of the door or wall section it illuminates. Post-mounted lanterns should stand 6.5 to 7 feet above grade for adequate clearance and light distribution.

