Outdoor spot lighting transforms yards from invisible afterthoughts into nighttime showcases. Whether the goal is highlighting architectural features, improving security, or creating drama around specimen trees, well-placed spots deliver focused beams that draw the eye exactly where a homeowner wants it. Unlike broad floodlights that wash everything in harsh light, spotlights create contrast and depth. They’re also more versatile than path lights or deck fixtures, offering directional control that works for everything from uplighting columns to accenting garden sculptures. The right setup requires understanding beam angles, power sources, and installation techniques, but the payoff is a landscape that works after dark.
Table of Contents
ToggleKey Takeaways
- Outdoor spot lighting creates focused beams with 15–45 degree angles that add dimension and visual drama to architectural features, trees, and landscapes far more effectively than broad floodlights.
- LED spot lights consume 80 percent less energy than halogen models and last 25,000–50,000 hours, making them the market-dominant choice for residential and commercial applications in 2026.
- Choosing the right lumen output is critical: small features need 100–200 lumens, medium trees require 300–500 lumens, and large architectural features demand 700+ lumens to avoid overlighting and glare.
- Low-voltage systems (12V or 24V) offer a balance between safety and performance, allowing homeowners to install fixtures without an electrician in most jurisdictions while maintaining brightness for accent lighting.
- Effective placement strategies—including uplighting, downlighting, silhouetting, and grazing—require testing angles at night and layering multiple lighting techniques to create visual interest without excessive light trespass.
- Proper installation demands using direct-burial cable, correctly sized transformers, silicone-filled connectors, and annual lens cleaning to prevent voltage drop, corrosion, and output loss.
What Is Outdoor Spot Lighting and Why Does It Matter?
Outdoor spot lighting refers to fixtures that emit a concentrated beam of light, typically with a beam angle between 15 and 45 degrees. This narrow focus distinguishes spots from floods (which spread 90+ degrees) and makes them ideal for accent lighting rather than area illumination.
The primary purpose is visual impact. Spotlights create shadows and highlights that add dimension to flat facades, reveal texture in stone or brick, and make focal points pop after sunset. They’re commonly used to uplight trees, columns, or statuary, or to downlight from eaves and pergolas onto patios.
Beyond aesthetics, spots serve practical roles. Security improves when entry points, driveways, or dark corners get targeted illumination, intruders avoid well-lit zones. Safety increases along steps, grade changes, or poolside areas where focused light prevents trips without creating glare. In commercial settings, spots meet code requirements for egress lighting while maintaining curb appeal.
Modern fixtures also address energy and longevity concerns. LED spot lights consume a fraction of the wattage that halogen models demanded a decade ago, and they last 25,000 to 50,000 hours compared to halogen’s 2,000-hour average. This shift has made permanent outdoor lighting installations far more viable for residential budgets.
Types of Outdoor Spot Lights for Every Application
LED vs. Halogen Spot Lights
LED spot lights dominate the market in 2026 for good reason. A typical 10-watt LED delivers the same lumen output as a 50-watt halogen, cutting energy costs by 80 percent. LEDs also run cooler, halogen bulbs can hit 500°F, posing burn risks and potentially scorching nearby foliage. Heat also degrades housings and lenses faster, shortening fixture life.
Color temperature matters. Most landscape pros recommend 2700K to 3000K (warm white) for residential settings: it mimics incandescent tones and flatters natural materials. Cooler temperatures (4000K+) look clinical and wash out warm brick or wood tones.
Halogen still has niche uses. Some designers prefer its continuous spectrum for rendering colors accurately in high-end plantings or art installations. Halogen fixtures are also cheaper upfront, though replacement bulb costs and energy bills erase that savings within a year. If choosing halogen, specify MR16 or PAR bulb types with built-in reflectors for tighter beam control.
Solar-Powered and Low-Voltage Options
Solar spot lights appeal to DIYers avoiding electrical work. They install in minutes, stake them into the ground, angle the panel toward south-facing sun, and the integrated battery charges during the day. Performance has improved dramatically: quality units now offer 200+ lumens and run six to eight hours per charge.
Limitations remain. Solar works poorly under tree canopy or on north-facing slopes. Winter daylight hours reduce runtime. They’re best for supplemental accents, path edges, small shrubs, or seasonal displays, not primary architectural lighting.
Low-voltage systems (12V or 24V) strike a balance between safety and performance. A transformer steps down standard 120V household current, eliminating shock risk and allowing homeowners to handle wiring without an electrician in most jurisdictions (always verify local codes). Low-voltage wire can run through mulch beds or under pavers without conduit in many areas, simplifying installation.
Fixtures connect via quick-connect hubs or wire nuts. Total circuit length and fixture count must stay within the transformer’s wattage capacity, a common 300-watt transformer handles roughly thirty 10-watt LED spots on a single run, though voltage drop limits practical runs to 100 feet unless using a multi-tap transformer.
Line-voltage (120V) spot lights deliver the brightest output and work for commercial-grade applications or tall trees requiring serious lumens. Installation requires GFCI-protected circuits, weatherproof boxes, and, depending on jurisdiction, a licensed electrician. Burial depth for UF-rated cable is typically 12 inches in residential zones, 18 inches under driveways, per NEC Article 300.5.
How to Choose the Right Outdoor Spot Lights for Your Space
Start with lumen output. For small shrubs or ground-level accents, 100–200 lumens suffices. Medium trees (15–25 feet tall) need 300–500 lumens. Large architectural features or mature trees demand 700+ lumens. Overlighting creates glare and washes out detail, less is often more.
Beam angle shapes the effect. Narrow spots (15–25 degrees) create sharp circles ideal for small targets like statuary or tree trunks. Medium beams (30–40 degrees) cover wider areas and work well for facade uplighting or large shrubs. Anything above 45 degrees blurs into flood territory.
Color Rendering Index (CRI) measures how accurately a light source reveals true colors compared to natural sunlight. A CRI above 80 is acceptable for general landscape use: above 90 is ideal for gardens with colorful blooms or art pieces.
Housing material impacts longevity. Die-cast aluminum resists corrosion better than plastic and dissipates heat effectively. Brass or copper fixtures develop a patina over time, which some homeowners prize aesthetically. Powder-coated finishes hold up better than paint in UV exposure and moisture.
IP ratings indicate weather resistance. IP65 (dust-tight, protected against water jets) is the minimum for outdoor use in most climates. Coastal or high-humidity zones benefit from IP67 or IP68 (submersion-resistant).
Adjustability matters for long-term flexibility. Look for fixtures with 180-degree swivel and 90-degree tilt so the beam angle can be refined as plants grow or priorities shift. Stake-mounted spots offer the most flexibility: surface-mount or recessed fixtures lock into permanent positions.
Best Placement Strategies for Maximum Impact
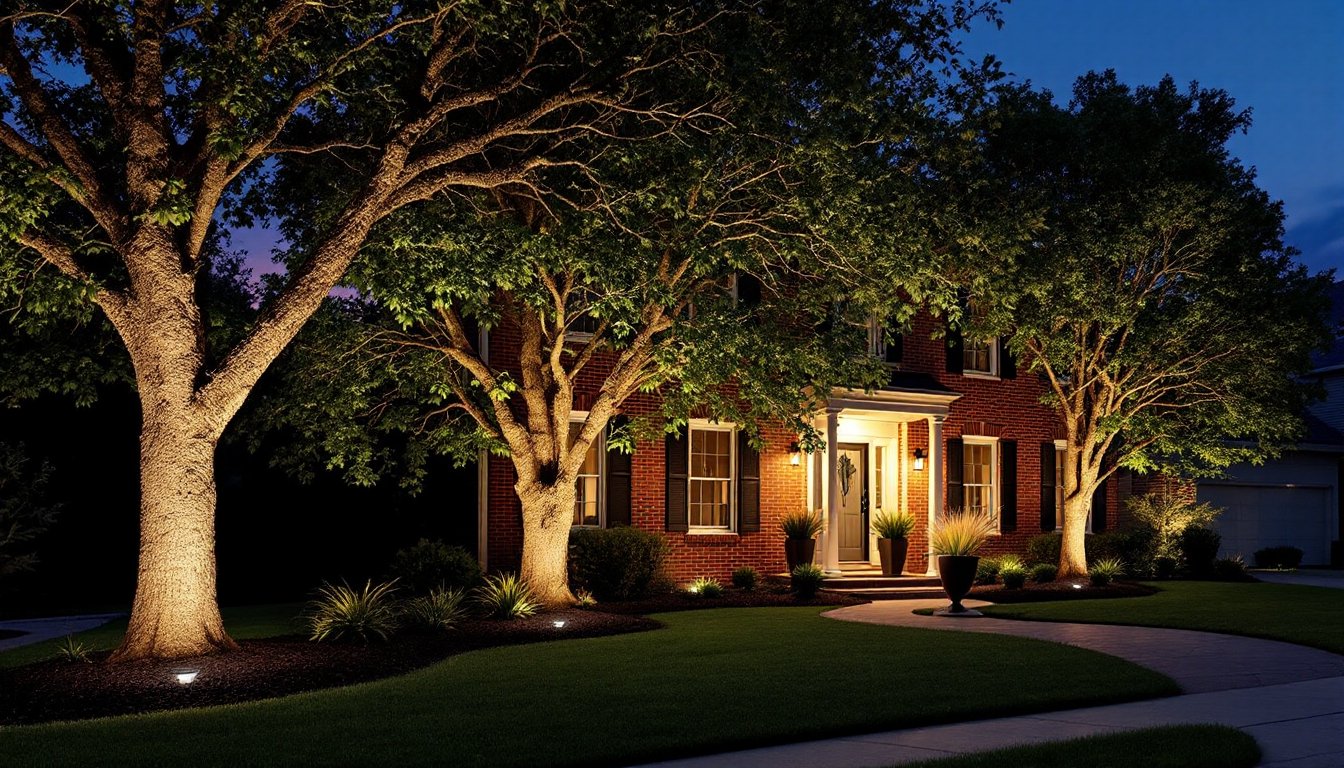
Uplighting is the workhorse technique. Place spots at the base of a feature, tree trunk, column, or wall, and aim upward at a 30–45 degree angle. Distance from the target controls beam spread: closer placement creates a narrow wash, while backing off six to ten feet widens coverage. For trees, position fixtures outside the drip line to avoid root damage and keep wiring accessible.
Downlighting (also called moonlighting) mounts fixtures high in trees or under eaves, aiming downward to simulate natural light filtering through branches. This works beautifully for patios or pathways beneath. Use fixtures with glare shields or louvers to prevent direct line-of-sight into the bulb, naked downlights create harsh spots that ruin the effect.
Silhouetting places the light source behind an object (like an ornamental grass or sculpture) and in front of a wall or fence. The object appears as a dramatic dark shape against the illuminated backdrop. Requires a smooth, light-colored surface behind the subject to work effectively.
Grazing positions spots close to textured surfaces, stacked stone, brick, or stucco, and aims the beam parallel to the wall. The raking light exaggerates texture and creates pronounced shadows. Mount fixtures 6–12 inches from the surface and space them evenly for uniform coverage.
Avoid light trespass onto neighboring properties. Aim beams down or inward, and use shielded fixtures near property lines. Many municipalities have ordinances limiting spill light, especially in residential zones.
Layering combines techniques for depth. A front yard might uplight two flanking trees, graze the facade, and add path lights along the walkway, each layer at a different intensity and height creates visual interest without over-lighting.
Installation Tips and Common Mistakes to Avoid
Always call 811 before digging to mark underground utilities, even shallow trenches for low-voltage wire can nick gas or irrigation lines.
For low-voltage systems, run wire in continuous lengths from the transformer to each fixture rather than daisy-chaining. This minimizes voltage drop and ensures consistent brightness. Use direct burial cable rated for wet locations (not standard speaker wire, which degrades outdoors).
Bury cable 6 inches deep in planting beds, deeper if crossing lawn areas where aeration or future digging might occur. Mark wire runs with a photo or diagram, you’ll thank yourself when expanding the system later.
Size the transformer correctly. Add up total fixture wattage and choose a transformer rated at least 20 percent higher to prevent overload. Place it near a GFCI outlet, under an eave or in a weatherproof enclosure, not sitting in mulch or on the ground where moisture collects.
Test placement before installing. Stake fixtures loosely, run the system at night, and adjust angles. What looks right during the day often shifts after dark. Take photos from key viewing angles (front door, street, patio) to evaluate balance.
Common mistakes include overlighting (blasting every feature at full brightness creates a stadium effect), ignoring seasonal changes (deciduous trees lose leaves, shifting the effect), and poor wire management (loose connections corrode and cause flickering).
Use silicone-filled wire nuts or heat-shrink connectors rated for direct burial, standard wire nuts fail in wet conditions. Apply dielectric grease to all connections to block moisture.
Clean lenses annually. Dust, pollen, and mineral deposits from sprinklers cut output by 30 percent or more. A soft cloth and mild detergent restore brightness without scratching polycarbonate or glass.
If dimming or color control is desired, verify fixtures are compatible with the dimmer type. Not all LEDs play nice with standard dimmers, look for models specifying compatibility or consider a low-voltage controller with built-in dimming.
Wear gloves and safety glasses when handling fixtures and cutting wire. Use a voltage tester to confirm power is off before making any connections on line-voltage systems. Even low-voltage systems warrant caution, while 12V won’t shock, short circuits can spark and burn.

