Four-inch recessed lighting trim is the visible finishing ring that snaps or screws into the housing of a recessed can light. While the housing does the structural work up in the ceiling, the trim controls how the light looks, where it points, and how much glare hits the room. It’s a small component that makes a big difference, swap out a basic baffle for a directional eyeball, and a flat overhead light becomes an accent spotlight. Most trim styles are interchangeable with standard housings, which means homeowners can upgrade the look and function of existing fixtures without tearing open drywall. This guide covers the most common 4 inch trim types, how to match them to room needs, and the straightforward installation process.
Table of Contents
ToggleKey Takeaways
- Four-inch recessed lighting trim is a decorative and functional bezel with a ~4-inch nominal aperture that controls light direction, glare, and overall appearance of recessed can lights without replacing the housing.
- Choose baffle trim for soft ambient lighting in living spaces, reflector trim for task lighting in kitchens or bathrooms, and gimbal or eyeball trim for directional accent lighting on artwork or architectural features.
- 4 inch trim compatibility depends on housing manufacturer and model—always check the housing label for model numbers before purchasing to ensure proper fit and compliance with fire rating requirements.
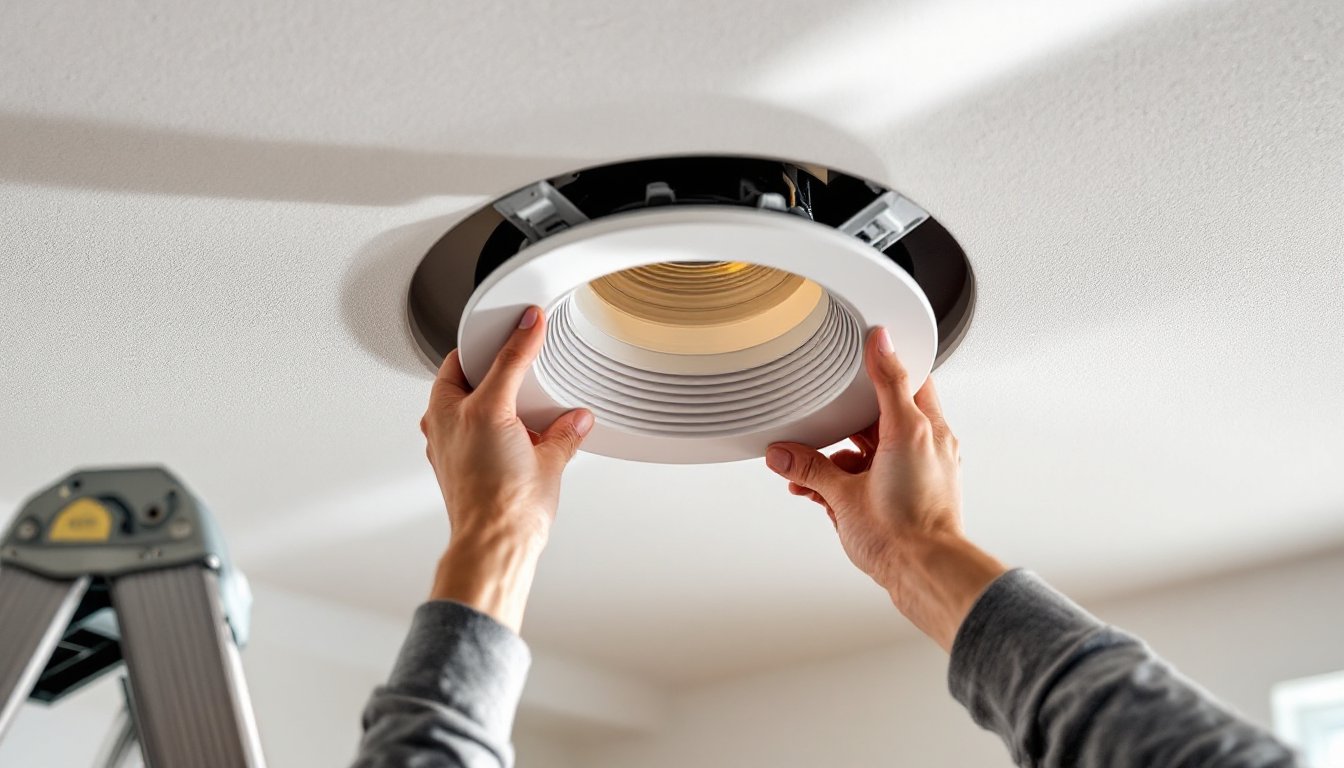
- Installation of recessed lighting trim is tool-free and takes minutes: secure the lamp, compress spring clips (or thread the trim ring), and confirm the trim sits flush with the ceiling for a professional finish.
- Wet location showers require both trim and housing rated for wet conditions per NEC Article 410, not just wet-rated trim alone.
- Larger ceiling heights above 9 feet may require 5-inch or 6-inch trim for adequate light coverage, while 4 inch cans work best in standard 8-foot residential spaces.
What Is 4 Inch Recessed Lighting Trim?
Recessed lighting trim is the decorative and functional bezel that fits into the opening of a recessed light housing. The housing itself, the metal can, sits above the ceiling between joists and contains the electrical components and lamp socket. The trim clips or threads into the housing from below and provides the finished appearance from inside the room.
Four-inch trim refers to the nominal aperture size, meaning the visible opening is roughly 4 inches in diameter. The actual trim ring flange is larger, typically around 5 to 5.5 inches, to overlap the drywall opening and hide rough edges. This size is popular in residential spaces with standard 8-foot ceilings, hallways, closets, bathrooms, and kitchens where a tighter layout or lower-profile look is desired compared to 5-inch or 6-inch cans.
Most 4 inch trims use either torsion spring clips or threaded retaining rings to secure them to the housing. Spring clips compress and then expand once inside the can, locking the trim in place. Threaded models screw into the housing lip and allow for fine height adjustment. Either system is tool-free for the installer, though a stepladder and steady hands are essential.
Trim compatibility depends on the housing manufacturer and model. Some housings accept universal trims, while others require brand-specific parts. Always check the housing label (usually printed on the inside of the can or on a sticker near the junction box) for the model number before buying trim.
Types of 4 Inch Recessed Lighting Trim Styles
Choosing the right trim style depends on the lighting goal: general illumination, task lighting, or accent. Each style controls beam spread, glare, and directionality.
Baffle and Reflector Trims
Baffle trim features interior ribbing or grooves, usually painted matte black or white, that absorb and diffuse light. This reduces glare and creates a softer, more even wash across the ceiling and walls. Baffle is the go-to for general ambient lighting in living rooms, bedrooms, and hallways where harsh overhead glare would be distracting. The ribbed surface also hides the lamp somewhat, making the fixture less noticeable when viewed at an angle.
Reflector trim has a smooth, often glossy interior, typically white, chrome, or gold finish, that bounces as much light as possible out of the can. Reflector trim produces a brighter, more focused beam compared to baffle. It’s a better choice for task areas like kitchen counters, bathroom vanities, or workbenches where maximum lumen output matters. The trade-off is increased glare if the fixture is in the direct sightline.
Both styles are available with integrated LED modules or as empty trims designed for screw-in BR30 or PAR20 bulbs. Integrated LED trims are more energy-efficient and longer-lasting but can’t have the bulb swapped if it fails, the entire module must be replaced. Screw-in trims offer flexibility to change color temperature or wattage later.
Gimbal and Eyeball Trims
Gimbal trim includes an adjustable inner ring that pivots on two axes, allowing the light source to tilt and rotate inside the housing. This makes it ideal for accent lighting, highlighting artwork, architectural details, or feature walls. The adjustable range is typically 30 to 35 degrees from vertical. Gimbals come in baffle or reflector finishes, so the installer can control both direction and glare.
Eyeball trim is similar but uses a protruding spherical lamp holder that swivels within the trim ring. The eyeball design offers slightly more range of motion than a gimbal and is more visually prominent, which can either be a design feature or a distraction depending on the room aesthetic. Eyeballs work well in galleries, retail-inspired spaces, or anywhere a more industrial or commercial look is acceptable.
Both gimbal and eyeball trims require the housing to support directional trim, not all 4 inch cans do. Housings rated only for fixed vertical trim won’t have the internal clearance or socket orientation needed for angled light.
Shower trims are another category worth mentioning. These feature a sealed tempered glass or acrylic lens and a gasketed flange to meet wet location ratings per the National Electrical Code (NEC Article 410). Standard open trims are rated for dry or damp locations only and should not be installed directly over a tub or inside a shower enclosure without proper wet-rated housing and trim.
How to Choose the Right 4 Inch Trim for Your Space
Selecting trim starts with understanding the room’s function and the housing already installed. Here’s a practical decision tree:
For general ambient lighting in bedrooms, living areas, or hallways, use baffle trim with a wide flood beam (around 40 to 60 degrees). Choose warm white (2700K to 3000K) if the space is residential and relaxed.
For task lighting over counters, desks, or vanities, opt for reflector trim with higher lumen output and a slightly narrower beam (25 to 40 degrees). Neutral white (3500K to 4000K) offers better color rendering for detailed work.
For accent or directional lighting, specify gimbal or eyeball trim. Pair it with a narrow spot beam (15 to 25 degrees) to draw focus without washing out the target. Adjustable trim is wasted if there’s nothing specific to highlight, don’t use it just because it looks “fancier.”
For wet locations like showers, make sure both the housing and trim carry an IP rating or UL wet location certification. The trim alone isn’t enough: the entire assembly must be rated.
Check ceiling height as well. In rooms with ceilings above 9 feet, 4 inch cans may appear undersized or produce insufficient light coverage unless spacing is tightened or lumen output is increased. For ceilings 10 feet and higher, 5-inch or 6-inch trim often makes more sense.
Finally, confirm trim compatibility with the existing housing. If the housing was installed by a previous owner or contractor, take a photo of the label inside the can or bring the housing model number to the supply house. Universal trim kits exist, but brand-matched components always fit better and meet fire rating requirements without guesswork.
Installing 4 Inch Recessed Lighting Trim
Installing trim is one of the easiest parts of recessed lighting work, no electrical beyond confirming power is off, and no drywall cutting if the housing is already in place. But it still requires attention to detail.
Safety first: Turn off power at the breaker, not just the wall switch. Use a non-contact voltage tester to confirm the circuit is dead before touching anything inside the housing.
Materials and tools needed:
- 4 inch recessed trim (matched to housing)
- Compatible LED module or lamp (BR30, PAR20, or integrated)
- Stepladder
- Non-contact voltage tester
- Clean cloth or microfiber towel
Step-by-step installation:
-
Remove the old trim (if present). For spring-clip models, squeeze the clips together and pull the trim straight down. For threaded trim, rotate counterclockwise until it unscrews from the housing.
-
Clean the housing opening. Wipe away dust, drywall debris, or old paint from the lip where the new trim will seat. A poor seal here can create light leaks or rattling.
-
Install the lamp or LED module into the socket inside the housing. For screw-in bulbs, hand-tighten only, overtightening can crack the base or damage the socket. For integrated LED modules, follow the manufacturer’s plug-in or twist-lock instructions.
-
Attach the trim. For spring-clip trim, compress the clips against the trim ring and guide them up into the housing slots. You’ll feel them pop into place. Gently tug downward to confirm they’re locked. For threaded trim, align the threads and rotate clockwise until the trim sits flush with the ceiling. Don’t overtighten, this can crack the trim flange or drywall.
-
Restore power at the breaker and test the fixture. Check that the trim sits flat, the light output is even, and there’s no buzzing or flickering. If the trim is loose or rattles, it’s likely not fully seated or the springs are faulty.
Common installation issues:
- Trim won’t fit: Housing and trim are mismatched. Double-check the model numbers.
- Trim rattles or sags: Springs are worn or not seated in the correct slots. Remove and reinstall.
- Light leaks around the edge: Trim flange isn’t sitting flush. Check for debris, paint buildup, or a warped trim ring.
- Flickering after install: Likely a loose lamp or poor contact in the socket, not a trim issue. Reseat the bulb or module.
If installing trim in a new construction project where the housing was just installed, wait until after drywall finishing and painting. Trim installed too early can get damaged or covered in joint compound.
Conclusion
Four-inch recessed lighting trim gives homeowners the ability to dial in both the look and function of their overhead lighting without major renovation work. Whether the goal is soft ambient light with baffle trim or adjustable accent lighting with a gimbal, the right trim makes the fixture work harder and look cleaner. Installation is straightforward for anyone comfortable on a ladder and familiar with basic electrical safety. Match the trim to the housing, choose the style based on room function, and don’t skip the prep work, it’s the difference between a professional result and a rattling eyesore.

